Body
Purpose
The purpose of this article is to detail the process for plugging in a MacBook and getting it to mirror to secondary displays (such as classroom projectors).
Target Audience
Prerequisites
- Mac laptop or iPad
- Classroom or Conference space containing a USB-C cable
- If there is only an HDMI, you will need a USB-C adapter to connect to newer devices.
Description
This will guide users to connect an Apple laptop or iPad to a display or projector
Resolution or Procedure Steps
- Plug the USB-C cable into your device. If there is no USB-C cable, attach the HDMI to an adapter and plug the adapter into your device.
- On the touchpanel display, select Laptop/Tablet Connection.
- If prompted, select the input that you are currently using.
Note: If you are using an adapter, make sure to select the connector that is coming from the podium!

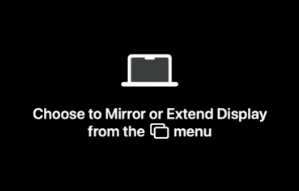
- The display or projector might show a “Choose to Mirror or Extend Display from menu” message until you start mirroring:
- On your Mac laptop or iPad, click the Control Center icon [1] in the top-right corner of your screen, and click on Screen Mirroring [2].

- In the Screen Mirroring dialog, click Choose Content.

- Select one of the following:
- Mirror Entire Screen [1]
- Mirror a Specific Window or App [2]
- Use as an Extended Display [3]

- Select the option that best fits your presentation, then click Start Mirroring.
First time in a room? You may see a Screen Mirroring window appear, asking how you’d like to share your screen. If you get this pop-up, you can simply select the option you prefer without issue!
Common Issues/Troubleshooting
Additional Information
If you need additional assistance, please call the Tech Hub at (615) 343-9999.